Sunday, May 5, 2013

We Are Healthy Because We Eat Lard!

This is part of an article posted by William G.Winter, the entirety and follow-up posts can be found here AT THIS LINK...


"REAL LARD is rendered pork fat (it is called tallow if it comes from a ruminant such as beef cattle). RENDERING is gently heating the fat to separate out the protein strands, the “cracklings”. Interestingly, the cracklings can be a good health food assuming the hogs are pastured, and the rendering natural.  Pure lard is a beautiful, white, naturally-hydrogenated (and therefore healthful), solid fat. Most of its carbon  sites are filled with hydrogens in their natural and normal cis position just as it comes from the hog. Good lard is only 40% SATURATED fat, with 48% MONOUNSATURATED and 12% POLYUNSATURATED  fat.

Lard is stable and the preferred fat for frying, it does not easily turn into trans fats when heated. Potatoes, for example, fried in lard can be cooked in a shorter time at a higher temperature resulting in a better taste and texture as well as less rancidity and embedded oil. Lard is a HEALTH FOOD that needs to be returned to it’s rightful place in the American diet.

There are two kinds of fatty acids that our body cannot make and are therefore called ESSENTIAL FATTY ACIDS, they are both polyunsaturated 18 carbon molecules. OMEGA 6 is double unsaturated LINOLEIC acid and OMEGA 3 is the triple unsaturated LINOLENIC acid. the Omega number refers to the location of the first double bond. Like the other polyunsaturated fatty acids (PUFAs) they are very unstable, go rancid easily and should never be heated. Special and incredibly healthful EFA Omega 3 fats include CONJUGATED LINOLEIC ACID (CLA) which is found in grass-fed animals especially ruminants, DHA (the brain fat)  and EPA which are found primarily in deep ocean fish, and GLA found in some plant oils.

Organically-raised, foraging and outdoor range hogs have the healthiest lard. Conventionally-raised pork get virtually no exercise, live indoors and eat no greens. Much of their diet is of the lowest possible quality.   This lard is of equally low quality. The diet and lifestyle of the hog radically affects the quality of the lard!

Confinement pork lard has similar OMEGA 6:3 ratios to feedlot beef, a 100 gm serving has about 8 grams of O-6 and 0.8 grams of O-3.  A much more healthful ratio of O-6:O-3 can be achieved by increasing the amount of fresh green forages. The O-3 content can be greatly enhanced by feeding flax seed, sea greens, green algae or fish oils. On the other hand, hogs that eat garbage, especially bakery waste will incorporate toxic trans fats, heavy metals or other toxins in the fat. Never consider lard from feedlot “garbage” hogs a health food!   At the other end of the spectrum, free-living warthogs have a ratio approaching 1:1!

The health of Americans plummeted when the “politically correct” diet advice recommended vegetable oils for cooking, especially partially-hydrogenated oils. Shortening, for example, is a liquid oil until manufacturers heat it up under pressure, bubble hydrogen gas into it (with a catalyst to make it all work faster) and force-feed the C double bonds  hydrogen atoms that often latch on in a crossways or trans configuration. (“cis” means “same side whereas “trans” means on the opposite side). A little bit of hydrogen added in the trans configuration increases shelf life of the oil and allows liquid vegetable oils and corn oil not to go rancid in large, clear containers exposed to light and heat on the store shelves A lot of hydrogen added in the trans configuration solidifies the liquid oil, creating stick margarine or solid vegetable shortening, such as Crisco.  Polyunsaturated oils go rancid easily due their unstable double bonds.

Fats are made of FATTY ACIDS which are the carbon-hydrogen chains (C-C-C-C-C-C-C-C-C-C) that latch on in groups of three to a glycerol backbone to make a TRIGLYCERIDE molecule, which are the basic molecules of which all fats are made. The length of the carbon chains and where, if any, double bonds (ie, missing hydrogen molecules) occur differentiate the fatty acids one from another. The more double bonds, the more unsaturated. One double bond gives you a monounsaturate, many double bonds gives you a polyunsaturate, no double bonds gives you a saturated fatty acid. The main saturated fatty acids (from shortest to longest chains): CAPRIC, LAURIC, MYRISTIC, PALMITIC, and STEARIC acids. The main monounsaturate is OLEIC acid.

Olive oil contains 71% OLEIC acid, that heart-healthy, monounsaturated fat that we’re supposed to get more of. Lard contains 44% oleic acid, sesame oil (41%),corn oil (28%), walnut oil (28%), flaxseed oil (21%), cottonseed oil (19%) and sunflower oil (19%),  grapeseed oil (15%) and safflower oil (13%), beef tallow (43%), butterfat (29%), and human butterfat (ie the fat of breast milk at 35%).
Lard  (14%) of the 18-C saturated fat, STEARIC acid, which has been shown in clinical testing to lower cholesterol.

Like olive oil, lard contains 10% of the omega-6 fatty acid LINOLEIC acid, again, roughly the same as human butterfat (breast milk) at 9%.

Lard contains 2% MYRISTIC acid, a 14-C saturated fat that has been shown to have important immune enhancing properties. Human butterfat 8% myristic acid, cottonseed oil (1%) and the tropical oils, coconut oil (18%) and and palm kernal oil (16%) vegetable oils have zero.

Lard contains 26% PALMITIC acid, a 16-C saturated fatty acid, olive oil only 13%, human butterfat contains 25%. Palmitic acid is antimicrobial.

Lard’s basic fatty acid composition as compared to the butterfat of human breast milk. Lard is less saturated, and more monounsaturates:

                                              Saturated          Monounsaturated         Polyunsaturated
Breast Milk                                   48%                    35%                                  10%
Lard                                              42%                    44%                                  10%

WE NEED SATURATED FAT- It makes up over half of all cell membranes and give cells stiffness and integrity. Bones require about 50% of the dietary fat to be saturated so calcium can be absorbed. SF lowers Lipoprotein-a in the blood, an inflammatory marker directly associated with risk of heart disease. SF protects the liver from alcohol, toxins and drugs and the enhance the immune system. Omega 3 fats are retained in the tissue when the diet is rich in SF. Heart muscle contains rich deposits of stearic and palmitic fatty acids as they are the foods the heart muscle uses and which are drawn upon in times of stress. Many SF have antimicrobial properties and protect us from harmful pathogens in the intestine.  There is no scientific evidence to back up claims that SF causes “artery clogging” in fact arterial plaque is only 26% SF the rest unsaturated fat, over half of the plaque is polyunsaturated fat!

TRANS FATS- Are one of the most dangerous foods in the world. They serve no purpose in the body except to cause inflammation, cancer and degenerative disease. TF began to enter the diet of Americans around 1910. Not too many years later we began to see the heart attack “epidemic” begin. Now, most Americans consume up to or more than 20% of their fat intake as trans fats. French fries cooked in vegetable oils (as they all are nowadays) have about 40% TF, cookies and crackers range from 35-50%,and doughnuts are 35-40% TF. If mothers eat TF it will cross the placenta and every cell in the baby will contain TF, even the brain.  Every cell membrane is a layer of fat with a thin protein coating on both sides. If TF gets built into the membrane it is defective and won’t resist viral or other infection and it becomes cancer prone (seen most often in the current skin cancer “epidemic”). TF cause problems in the brain as DHA or other brain fats cannot be made from it, and the stiff and straight abnormal molecule creates overly rigid membranes.  By eating a good balance of SATURATED FATS, POLYUNSATURATES and AVOIDING TF, it is thought that we can prevent MS, ALS, Alzheimer’s, Parkinson’s Disease as well as depression, schizophrenia, and other mental illnesses."

Sunday, March 24, 2013

Hot Apple Dumplings


2 Granny Smith apples
1 cup water
1 cup sugar divided
1 stick butter
1/4 tsp. vanilla extract
8 canned biscuits (I use Pillsbury buttermilk)
4 teaspoons ground cinnamon

  • Preheat oven to 375 degrees. Peel, core and slice apples vertically into 8 slices each. Cover with cold water to keep them from getting brown while you prepare the rest of the recipe.
  • In a medium saucepan, mix the water, 3/4 cup of the sugar, butter and vanilla over heat and bring mixture to a boil.
  • Separate each biscuit in half. Wrap biscuit dough layer around a slice of apple, stretching it to slightly overlap and seal the bottom.
  • Place the wrapped slices sealed side down in a 9 X 13 baking pan. Pour the hot sugar mixture over the apple slices.
  • Mix the remaining 1/4 cup sugar with cinnamon and sprinkle over the tops of the wrapped apples. Bake for 35 minutes or until golden brown. Serve warm with vanilla ice cream! YUM!
 
Shared via Karen's Kreative Cooking on Facebook

Momma's Apple Crisp


2 cups all-purpose flour
2 cups rolled oats
1 teaspoon ground cinnamon
1/2 teaspoon ground nutmeg
1 1/2 cups packed brown sugar
1 1/2 cups butter
2 quarts peeled, cored and sliced apples
 
  • Preheat oven to 350 degrees F (175 degrees C). 
  • In a large bowl, combine the flour, oatmeal, cinnamon, nutmeg and brown sugar. 
  • Cut butter into mixture until crumbly. 
  • Take half of the mixture and pat it into the bottom of a 9x13 inch baking dish. 
  • Cover crumb mixture with apple slices, then sprinkle apple slices with remaining crumb mixture. 
  • Bake at 350 degrees F (175 degrees C) for 45 to 50 minutes or until apples are tender.
 
Shared via A COUNTRY MOMMA'S HANDS on Facebook

Strawberry Angel Food Trifle


(1) store-bought angel food cake
24 oz. container frozen strawberries, sliced with sugar added, thawed
24 oz. or 3 cups vanilla pudding (We used 6+ small individual cups this time)
16 oz. container of whipped cream, slightly less than the whole container
Fresh strawberries for garnish

Tear angel food cake into medium pieces. Begin layering cake, strawberries, pudding and whip cream in a large clear glass bowl.Continue irregular layers, filling the bowl. Top entire dessert with a solid layer of whip cream. Slice a few fresh strawberries for garnish Refrigerate overnight or at least 4 hours before serving. To me it tastes like all the flavors of strawberry shortcake in one big yummy bite! I think it would be GREAT to add blueberries to this mix too.


Shared via THIS LINK

Sunday, November 11, 2012

First Aid Preparedness: Part 2

The Herbal First Aid Kit


The herbal first aid kit is essential to those who do not want to be dependent on pharmaceuticals and the political science behind them. In the event that excessive regulation should take over the medical industry, or should OTC medications be scarce or too expensive, this is where the herbal first aid kit comes into play.

Two main parts of the herbal first aid kit are tinctures and essential oils. Now, let's be straightforward so that no one gets caught up in the marketing hype, there is NO SUCH THING as "therapeutic grade essential oil." Should you be sure to investigate the purity of any essential oil that you purchase? Absolutely! The individual or company should be able to tell you where the plant was obtained from, and how the oil was extracted from the plant, as well as if any carrier oils were added to it for whatever reason. If they cannot tell you that, do not buy from them. However, there is no need to worry about any non-existent certification for essential oils.

While essential oils can be made at home, they do require some special equipment (like a steam distiller for steam distillation) which can be a bit costly. The cold press method does not require fancy equipment, but it can only be used for certain plants and nuts. An oil obtained by the "extraction" method uses chemicals to draw the oils out of the mixture created. Absolutes are often made this way. Your two main options, though, will be steam distilled (which is the majority) and cold pressed essential oils.

Clove essential oil is good to have on hand for toothaches. Tea Tree and Rosemary essential oils are good for antiseptics and antibacterials. Thieves Oil is a combination oil that is excellent against colds, flu, and other illnesses. If you can obtain it or make it, Jewelweed EO is good to have on hand as a poison ivy combatant. Thyme EO is a must-have for parasite and bacterial infection.

Tinctures are quite different than essential oils, and are usually made for ingestion. This can be done at home. (See a video from Mountain Rose Herbs on Youtube HERE)  

Echinacea tincture is good for an immune booster, and there are many others such as this anti-viral anti-flu tincture from Frugal Canning.

And while this is not a tincture or oil, a friend recently shared a homemade cold medicine.

HERE is a link to a PDF of many different herbs and their place in first aid care.

Do you have any suggestions or recipes that you would like to share? Leave a comment below!

Friday, November 9, 2012

First Aid Preparedness: Part 1


One of the most important, and often overlooked, aspects of preparedness is the family first aid kit. The ones you can buy in the stores that are pre-packed are usually very expensive and very limited. Therefore, it is more economical to build your own.

The first thing you will need is a plastic tote to put your supplies in. I would advise an orange or red rubbermaid or sterilite tote. These can be easily found at your local Walmart after Halloween and Christmas.


Then, to stock it. I have complied a list of some items that you may want to consider including in your first aid kit:


  • Antiseptic like Povidone Iodine.
  • Rubbing alcohol for wound and tool sterilization.
  • Hydrogen Peroxide.
  • Antibiotic cream like Neosporin and the type. Store brands work just as well as the name brands.
  • Hydrocortisone Cream.
  • Band Aids of all sizes, at least three or four boxes. Waterproof is best. 
  • Superglue, for sealing cuts and preventing infections. (They use superglue in hospitals as well.)
  • Non-stick gauze pads of various sizes and surgical tape for wounds that are too deep for band aids. 
  •  Campho-Phenique for bug bites and stings.
  • A few ACE bandages of different sizes.
  • A splint.
  • Activated Charcoal, in case of ingestion of anything potentially poisonous.
  • Pain Relief tablets like Ibuprofin or Excedrin. If you have children, make sure to get some children's Motrin and some medicine droppers or cups.
  • Low dose asprin. 
  • Cold Packs
  • Curved upholstery needles, locking needle nose pliers, and lightweight fishing line for stitching wounds if needed. (Learn How To)
  • Latex or non-latex gloves for sanitation purposes.
  • Hemostat Powder to help stop bleeding. Veterinary grade is fine for human use, and a lot cheaper.
  • A sport bottles of water, the kind with the pop-top, for eye rinsing. 
  • Hand Sanitizer or alcohol wipes.
  •  A Snake Bite Kit for extracting snake venom. Make sure to use an application of activated charcoal as well to treat the wound and destroy any venom that may have been missed. See how HERE.

This short list would be a good start to any emergency first aid kit. Many suggest also including a military grade field surgical kit like THIS ONE, if so desired. Others suggest a wound stapling kit, but from having parents and grandparents who have had staples, they are a lot more difficult to maintain, and stitching is my preferred method for larger wounds.

Do you have any other suggestions? Post them below!

Part 2 coming soon, tips, how-to's, and herbal first aid.

Wednesday, November 7, 2012

Preparedness Series: Intro


So, what is preparedness exactly? At first mention of prepping many conjure images of "doomsday extremists" who have the notion that the world is coming to an end (and we will somehow be able to survive it?) along with a zombie apocalypse and alien invasion. However, preparedness is actually very simple, very commonsensical, and also very biblical.

PREPA'REDNESS, n. The state of being prepared or in readiness.

In readiness for what? You may ask. Anything! Is my response.

Loss of a job. Cut in pay. Long term power outage. Natural disasters. Rising fuel and energy costs.

Anything.

So many, including our family, have found themselves in dire straights due to a layoff or an unexpected illness. Anything that may put a strain on your normal budget is what you need to be prepared for, and you need to be prepared for long term supplementation, especially in the event of a natural disaster like Hurricane/Superstorm Sandy which just recently hit the New England area, and Hurricane Katrina who's effects are still seen and felt even now, seven years later. FEMA cannot be depended on for a timely or sufficient response, as they have proven in every major natural disaster since Katrina, so we must be prepared to take care of ourselves, and our immediate neighbors.

Some topics that we will cover include the following:

1 - First Aid Preparedness: What to stock in your first aid kit, and how to use it.

2 - Primitive Cooking: How to cook what when power is out and natural  gas is not an option.

3 - Water Purification and Storage.

4 - Alternative Power: Such as solar power and hot water and how to build each system to work either off-grid or grid-tied. (Advice from a professional electrician)

5 - Sanitation: Laundry and sanitation tips for emergency times.

6 - Gardening: How to store seeds, how to save seeds (within the law), and some simple how-to's.

7 - Food Storage and Preservation: If the power goes out, you need to be prepared to store food.

8 - Small Livestock and Game

9 - Bugout Bags: Be prepared, in the event of a natural disaster, to have necessary items on hand if you have to leave your home and walk for help due to downed trees and communication.


 All will be linked as they are published, we are going to aim for one to three in-depth posts per week. If you have any requests or suggestions, please feel free to post here!


"Go to the ant, thou sluggard; consider her ways, and be wise: Which having no guide, overseer, or ruler, Provideth her meat in the summer, and gathereth her food in the harvest." Proverbs 6:6-8

Sunday, October 7, 2012

Pork Tenderloin with Pan Sauce

I'm always up for a new recipe, and the other day I ran across this one for

Pork Tenderloin with Pan Sauce by Chef Mommy.

It turned out REALLY well for me, and was delicious! I used the leftovers in a bean soup and it was amazing.

I HIGHLY recommend it! Give it a try, and let me know how it turned out for you!

Saturday, July 7, 2012

Thrifty Homemaking on a Middle Class Budget: Dinners #1

I have browsed the internet for YEARS looking for meal ideas to fit our rather low-end budget, and have come up with mostly naught. I've came across GREAT websites with AWESOME ideas, don't get me wrong, but these websites showcased "budgets" of over $150-$200 per week for these great menu plans. That is, unfortunately, unfeasible for us.

SO, in light of this, I have developed and discovered a few good tips over the years and want to share them with you. :-)

We are a single income family of eight with a grocery budget of approximately $80 weekly.

Yes, I said $80.00 per week to feed all seven of us (one is a baby) breakfast, lunch, and dinner.

One way that I have found to do this is by cutting the meat budget.

(Disclaimer: These meals are not specifically gluten free and not specifically SUPER healthy. We do what we have to do within our budget in order to not go hungry, and that does not include organic foods and grass-fed meats at the present time.)

I spend about $25.00 per week on meat for 7 or 8 dinners. To do this, I buy 4 of the 10# bags of chicken quarters from my local grocery store at .59 per pound, and divvy it between meals.

This one is frozen but they are sold thawed.
We have just recently begun to do all of our chicken cooking at the same time, on Fridays, along with all the work of deboning and chopping to save time and energy. 
When we can grill them, we do, but when we can't, I bake them skin on and skin-side up at 375* for 45 minutes to an hour depending on the thickness of the quarters. When juices run clear they are done. 
After they are cooked, we let them cool for a bit and then strip the skin off  and start taking the meat off of the bones, being careful of the little sharp bugger in the leg. 

Once the chicken is off of the bone, we chop it to casserole-sized pieces and bag it for the fridge/freezer in meal appropriate portions:

I label the bags with the date cooked. 
 They are usually good in the fridge for 4-5 days, and in the freezer indefinitely! All that needs to be done is a little sauteing in a pan with some oil or nuke it if you have a microwave. :-)
 Recipes for this method coming in my next post!

And this photo is just because she's a cutie!

See you next time on
Homemaking on a Middle Class Budget: Dinners #2


Monday, July 2, 2012

STRAWBERRY LEMONADE CAKE W/LAYERS


STRAWBERRY LEMONADE CAKE W/LAYERS ~
(Just in time for the Fourth)

INGREDIENTS:
•One box of strawberry cake mix (plus oil, water and eggs as directed on box)
•8oz. Philadelphia Cream Cheese (softened to room temp.)
•1 packet (0.23oz.) of Kool-Aid Lemonade
•Yellow food coloring gel (as desired for color)
•2cups Jet-Puffed Marshmallow Creme
•8 oz. Cool Whip Topping
•Fresh strawberries to garnish.

DIRECTIONS:
•Make cake according to box and bake in 2- 9 inch round cake pans as directed. Turn finished cakes over on cake racks and allow to cool completely.
•Cream together cream cheese, lemonade and yellow food coloring until smooth.
•Mix marshmallow creme in and then mix in Cool Whip until completely smooth. Refrigerate until cake is cooled and cut.
•Cut each cake layer in half.
•Alternating layers of cake with layers of filling, assemble cake. End with layer of filling.
•Top with sliced strawberries.
•Refrigerate and serve chilled.

ENJOY
~Debbie~


SOURCE: https://www.facebook.com/photo.php?fbid=357907667616231&set=a.315453138528351.72812.119825421424458&type=1&ref=nf


Wednesday, May 9, 2012

*RECIPE* Pennsylvania Dutch Potato Pancakes


Ingredients:

4 pounds potatoes, peeled
2 large onions
1 egg
1 & 1/2 cups flour
2 tsp baking powder
1 tsp lemon juice
Ground nutmeg
Oil or vegetable shortening
1 Tbsp salt

Directions:

- Put raw potatoes and onions through food grinder, using fine blade. Drain thoroughly.
- Mix in egg, flour, baking powder, lemon juice, a pinch of nutmeg, and salt.
- Drop mixture by tablespoonfuls into two inches of hot oil (375*F).
- Fry for about ten minutes or until golden brown. Drain.

~Serves 6~

Friday, April 27, 2012

Best Brownies EVER! *Recipe*

Best Brownies EVER! (From scratch too!)

Courtesy of Angie at allrecipes.com. :-)

Ingredients

• 1/2 cup butter
• 1 cup white sugar
• 2 eggs
• 1 teaspoon vanilla extract
• 1/3 cup unsweetened cocoa powder
• 1/2 cup all-purpose flour
• 1/4 teaspoon salt
• 1/4 teaspoon baking powder

• 3 tablespoons butter, softened
• 3 tablespoons unsweetened cocoa powder
• 1 tablespoon honey
• 1 teaspoon vanilla extract
• 1 cup confectioners' sugar

Directions
1. Preheat oven to 350 degrees F (175 degrees C). Grease and flour an 8 inch square pan.
2. In a large saucepan, melt 1/2 cup butter. Remove from heat, and stir in sugar, eggs, and 1 teaspoon vanilla. Beat in 1/3 cup cocoa, 1/2 cup flour, salt, and baking powder. Spread batter into prepared pan.
3. Bake in preheated oven for 25 to 30 minutes. Do not overcook.
4. To Make Frosting: Combine 3 tablespoons butter, 3 tablespoons cocoa, 1 tablespoon honey, 1 teaspoon vanilla, and 1 cup confectioners' sugar. Frost brownies while they are still warm.


**I double the recipe for a family size pan (13x9) and increase baking time by 4 minutes. Frosting is optional of course. :-)

Monday, January 30, 2012

Peanut Butter Balls:

Ingredients:

*4 cups powdered sugar,

*18 oz creamy peanut butter,

*1/2 cup butter, softened,

*aprox. 12oz milk chocolate chips

*1/2 bar parafin wax.


Directions:

* Mix together peanut butter, sugar, and butter in a large bowl until all of the sugar has been mixed in then cover and refrigerate while melting the chocolate.

* Melt chocolate chips and wax on stovetop in a double boiler.

* Take peanut butter mixture out of the refrigerator and roll into small balls.

* Using a fork or toothpick, dip balls into chocolate and coat well.

* Let excess drip and then place on wax paper or greased foil.

* Let sit until chocolate is firm and then refrigerate.

Tuesday, January 17, 2012

Borax Free Laundry Detergent *Revised*

You can view my old recipe/post HERE, but after playing around with the recipe this year, I have made a few revisions, and this time I have photos!

To start with, you will need 2 bars of regular body soap. Any scent you would like, any brand you would prefer. Dr Bronners has good natural body soap in a variety of scents if you would like a natural soap. I used Softsoap or Dial most of the time just because it is more cost-efficient. :-)

Photo Credit http://igknowidea.blogspot.com

You will also need one cup of washing soda (Sodium Carbonate) and one cup of baking soda (Sodium Bicarbonate).

Photo Credit http://greenergreener.com

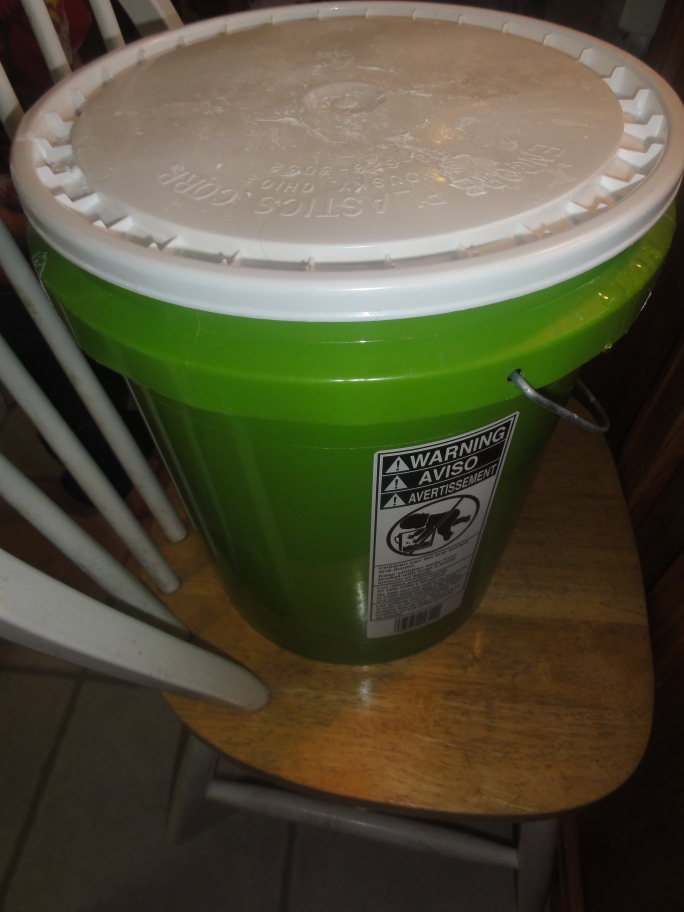
Hardware includes a large stock pot, a metal or wooden stirring utensil, a five gallon bucket with a lid (for safety), and hot tap water. I got my five gallon bucket from my dad who has a pool, I just washed it really well, but Hardware Stores like Lowes usually carry them for about $3-$5 each.

To begin:

#1 - Cut, chop, shred, or grate the bars of soap. The smaller the pieces, the better and quicker they will melt.

Photo Credit http://1.bp.blogspot.com

#2 - In your stockpot, combine your soap shreds and 2 cups of hot water, and stir over medium heat until soap pieces have melted. *Do not leave unattended for too long, because soap will burn.*


#3 - When soap has melted, add your additional 2 cups of hot water and stir together. Then reduce heat to medium-low and add your baking soda and washing soda. Stir well until the powders are dissolved.


#4 - At this point you can add a fragrance oil or essential oil of your choosing if you would like. For this batch, I am using coconut scented soap, and I am adding about a tablespoon of lemongrass essential oil for additional fragrance.


#5 - Now, pour your soap mixture *carefully, it's hot!* into your five gallon bucket, and fill the bucket to about 2 inches from the top with hot tap water.


#6 - Once the bucket is full, stir well to combine soap mixture and water, cover, and let sit overnight.


#7 - The next morning, you should notice a gel like consistency at the top of the bucket. This is good! This is how it is suppose to look. :-) Stir the contents of your bucket well, and you should now have a slightly lumpy looking thick liquid. This is your "concentrate". You can do what I do and just leave it in the bucket and use 1/2 cup per load. It make things easier. Be sure to stir the bucket contents about once per week. However, you can also use an old detergent container and fill it halfway with your concentrate and half with warm water. Shake gently before each use, and use 1 cup per load.

The total cost to make this detergent is about $3.00 per batch, and each batch can do about 100 loads at 1/2 cup per load, making the cost about $0.03 per load. :-)

A recipe for a powdered detergent can be found HERE.

Enjoy! Comment! Let us know how it works for you!

Wednesday, December 28, 2011

Why You Don't Want to Drink Pasteurized Milk

Posted By Dr. Mercola | March 26 2003 | 88,618 views


There is no substitute for clean, raw milk as a food, so far as children are concerned. Science has not yet succeeded in providing, in the pasteurized variety, those essential qualities that are the only real foundation for a healthy child.

Unfortunately, many grossly distorted statements are current regarding our milk supply. If we are to believe the protagonists of the Pasteurization-of-all-milk-at-all costs Party, raw milk is as good, or rather as bad, as rat poison--although as the Minister of Agriculture recently stated, "the human race existed long before Pasteur was heard of."

The process of pasteurization was debated in the House of Commons and the suggestion made that no raw milk should be sold for human consumption. This would mean installation of expensive machinery by every supplier, and if it should become compulsory there is little doubt that many small firms would shut down and the business pass in the hands of a few big dealers.

If we are to be compelled to drink pasteurized milk, we should at least understand what pasteurization means. It set out to accomplish two things: Destruction of certain disease-carrying germs and the prevention of souring milk. These results are obtained by keeping the milk at a temperature of 145 degrees to 150 degrees F for half an hour, at least, and then reducing the temperature to not more than 55 degrees F.

It is undoubtedly beneficial to destroy dangerous germs, but pasteurization does more than this--it kills off harmless and useful germs alike, and by subjecting the milk to high temperatures, destroys some nutritious constituents.

With regards to the prevention of souring, sour raw milk is very widely used. It is given to invalids, being easily digested, laxative in its properties, and not unpleasant to take. But, after pasteurization, the lactic acid bacilli are killed. The milk, in consequence, cannot become sour and quickly decomposes, while undesirable germs multiply very quickly.

Pasteurization's great claim to popularity is the widespread belief, fostered by its supporters that tuberculosis in children is caused by the harmful germs found in raw milk. Scientists have examined and tested thousands of milk samples, and experiments have been carried out on hundreds of animals in regard to this problem of disease-carrying by milk. But the one vital fact that seems to have been completely missed is that it is CLEAN, raw milk that is wanted. If this can be guaranteed, no other form of food for children can, or should, be allowed to take its place.

Dirty milk, of course, is like any other form of impure food--a definite menace. But Certified Grade A Milk, produced under Government supervision and guaranteed absolutely clean, is available practically all over the country and is the dairy farmer's answer to the pasteurization zealots.

Recent figures published regarding the spread of tuberculosis by milk show, among other facts, that over a period of five years, during which time 70 children belonging to a special organization received a pint of raw milk daily, only one case of the disease occurred. During a similar period when pasteurized milk had been given, 14 cases were reported.

Besides destroying part of the vitamin C contained in raw milk and encouraging growth of harmful bacteria, pasteurization turns the sugar of milk, known as lactose, into beta-lactose, which is far more soluble and therefore more rapidly absorbed in the system, with the result that the child soon becomes hungry again.
Probably pasteurization's worst offence is that it makes insoluble the major part of the calcium contained in raw milk. This frequently leads to rickets, bad teeth and nervous troubles, for sufficient calcium content is vital to children; and with the loss of phosphorus also associated with calcium, bone and brain formation suffer serious setbacks.

Pasteurization also destroys 20 percent of the iodine present in raw milk, causes constipation and generally takes from the milk its most vital qualities.

In the face of these facts--which are undeniable--what has the Pasteurization Party to say? Instead of compelling dealers to set up expensive machinery for turning raw milk into something that is definitely not what it sets out to be--a nutritious, health giving food--let them pass legislation making the dairy farmers produce clean, raw milk--that is, milk pure to drink with all its constituents unaltered.

RealMilk.com
 

Dr. Mercola's Comments:
 

So don’t waste your money on "organic" milk anymore. This is a waste of your resources. Redirect your energy to find real raw milk sources. Ideally, you can find a local farmer who will be willing to sell this to you. If you find one you will want to encourage him to consider restricting grains from the cow’s feed to improve the quality of the milk.
If you are unable to find a local dairy farmer who will cooperate with you please try this link: http://www.realmilk.com/where.html.
If you are in the Chicago area you can obtain raw milk from Michigan Amish farmers that bring it to the area every week or so.


Wednesday, July 20, 2011

Canning Tomato Sauce

I just canned my first jars of tomato sauce of the season, and thought that I might share with you how I did it. :-)

First, get some nice, healthy tomatoes. Rinse well in cold water.


Keep in mind that what you start with will decrease almost 50% in volume by the end of the process, so make how much you think you will use. I used about 20 large tomatoes and got four pints out of it. :-)

Peel the tomatoes using which ever method you prefer. Some prefer to blanch and peel, I simply used a paring knife.


Chop the peeled tomatoes and put them in a stock pot.


Then, either blend them with a stick blender, or otherwise mash them. I used my handy dandy, old-fashioned potato masher. :-)


When they are mashed well, set them to simmer, uncovered, on medium-low for 2-3 hours, or until desired consistency is reached, stirring often to prevent burning. Again, volume will likely be reduced by half.


When you've reached that consistency that you like, ladle into prepared jars leaving 1 inch of head space and hand tighten the lids on.


Pressure can for 15 minutes for pints, or 20 minutes for quarts, referencing the following altitude charts. Tomato sauce can be water bath canned if lemon juice is added, just add 1 Tablespoon of lemon juice per pint of tomato sauce, or 2 Tablespoons of lemon juice per quart.

You can also de-seed the tomatoes if you want to prepare a base for ketchup or tomato soup. :-)

See Simply Canning for more info as well.

Thursday, May 12, 2011

Homemade Deodorant!


I've been browsing the web for the past year looking for a tried and true good homemade deodorant recipe to no avail. Until last week, that is. :-)

I ran across Amy's post over at Homestead Revival where she shared a recipe for a cream deodorant (like what you see in the round container) and she had really great reviews about it not only from her own experience with it, but also her commentators had a lot of great things to say about it! Her recipe is as follows:

"Homemade Deodorant
(Makes one small canning jar - just over  1/2 cup)

1/4 C. baking soda
1/4 C. cornstarch or arrowroot
5 - 6 T. coconut oil
Tea Tree Oil (optional)

Combine the baking soda and cornstarch, then work in the coconut oil. I used my mixer to incorporate the two until well combined. 

If desired, add tea tree oil (anywhere from 5 - 20 drops) which has natural antibacterial qualities. I tried adding some lavender essential oil, but the coconut oil seemed to overpower the scent a bit. Just think of this deodorant as having a tropical scent and leave it at that. 

You can adjust the amount of coconut oil if necessary. I liked mine a bit dryer, but if you want, increase the oil up to 8 T. Also, if your room is warm, the oil might liquify at around 76 degrees, so move it to the refrigerator if necessary or a cooler room. I popped mine in the fridge so that it would firm up a bit after using the mixer.

To use: Rub a small amount on underarms."

But, I needed a stick recipe, at least for my hubby, because that's what he prefers. So I scrounged around a found a few more recipes and pieced something together that turned out pretty well!

As you can see in the picture, I used an old Old Spice deodorant container until I can get some new ones to fill. (The holes are in it because the piece that goes in the bottom has holes in it and even though I put some wax paper down to try to prevent it from going through, it found a way.) The stick recipe made enough for about 2 sticks, so it could probably be cut in half for just one stick.


Stick Deodorant:


6 Tbsp coconut oil
3 Tbsp beeswax
3 Tbsp pure cocoa butter (or shea or any firm butter)
3 Tbsp corn starch
3 Tbsp baking soda
2 Tbsp Aloe Powder
Essential oils as desired
*For his recipe I used about 10 drops of Bay Rum EO and 6 drops of Tea Tree EO.


1- Melt the beeswax in a double boiler over medium-high heat. 
2- Once almost melted, add the coconut oil and cocoa butter and stir frequently until melted.
3- Remove from heat and stir (or whisk carefully) in the powders, one at a time until well mixed.
4- Add the essential oils and stir to mix well and promote cooling.
5- Pour into stick container or mold and set in the refrigerator for a few minutes until firm.
6- Move to bathroom counter to let firming process finish. It should be ready within 2 hours or so.

He loves it! The Bay Rum is the base scent for the original Old Spice, which he likes, and I used the Tea Tree for the antibacterial and antiseptic properties. The Cocoa butter is moisturizing and nourishing to the skin, as is the aloe and coconut oil, and the beeswax has antibacterial properties in itself and helps to firm it up. The cornstarch and baking soda help neutralize odor too. Mind you, this is not an antiperspirant, I would encourage you to read Amy's post explaining how the body was designed to perspire, and it is actually very healthy for the body, but this is a deodorant to help eliminate any foul odor that may come with perspiration.

Now, for myself, I do not mind a cream deodorant so I decided to make mine a bit softer, but utilizing the same basic base. The following recipe yields approximately one cup.

Cream Deodorant:


1/2 cup coconut oil
3 Tbsp beeswax
1/3 cup pure mango butter (or shea or any butter that you prefer. I use Mango for the skin regenerative properties.)
1/4 cup corn starch
1/4 baking soda
3 Tbsp Aloe Powder
Essential oils as desired
*For my recipe I used about 1 tsp of Rosewood EO and 1/2 tsp of Lavender 40/42 EO, all purely for the scent.


1- Melt the beeswax in a double boiler over medium-high heat. 
2- Once almost melted, add the coconut oil and mango butter and stir frequently until melted.
3- Remove from heat and stir (or whisk carefully) in the powders, one at a time until well mixed.
4- Add the essential oils and stir to mix well and promote cooling.
5- Pour into a container and stir to cool significantly (because with this being a more liquid-like base the essential oils will separate and float easily, stirring prevents that) and once cooled, set in the refrigerator for a few minutes until firmer.
6- Move to bathroom counter to let firming process finish. It should be ready within an hour.
7- Apply with fingers or cotton ball. (Or if you have one of the stick containers with the little holes in the top, that may work well for this recipe.)

Let me say that I am SHOCKED at how well this recipe has worked for me! I applied it last night before bed and usually I wake up needing to immediately apply more, then by noon I have had to apply it between 4 and 7 times depending on how much I'm doing that day. It is now 2:00 in the afternoon and I've still not had to re-apply it. No signs of irritation yet either, and I have sensitive skin. It's working great for us so far.

Try it and let me know what you think!

Monday, March 21, 2011

Hot Chocolate Recipe from Kim

Hot Chocolate Recipe from Kim over at Homestead Acres.


HOT CHOCOLATE FEATURED

Written by  Kim Mills

Our Canadian winters are long and cold.  A favorite treat during that time is our homemade hot chocolate.  Nothing taste better after coming in from shoveling the driveway sledding with the kids.  I’ve found this a much taster and cheaper alternative then buying little cans at the store.
This also makes a wonderful gift!  Fill a quart canning jar with the mix.  Add some pretty ribbon around the top and you have a quick and easy gift.  Hot Chocolate
5 cups powdered milk
1 cup non dairy creamer
2 cups sugar
1 cup coco powder
Combine in a bowl and mix all together.
Place 3 TBS in a mug, top with boiling water and enjoy!


Sunday, March 20, 2011

Cows and Collards

Did you know that cows LOVE collard greens? :-)


Look at all that beef.... mmmmmmm
:-)

Saturday, March 19, 2011

Preparedness Challenge

A fellow blogger (and a person who has blessed me abundantly) over at Homestead Revival has started a Preparedness Challenge. I have decided to take on her challenge as well, and I encourage any of my readers to do the same! It's never a bad thing to be prepared, and if you have ever thought about getting into storing and putting up food in case of emergency, this would be an excellent place to start!

Below is her post:


A Call To Be Prepared

Well, I've held my peace for about as long as I can stand it. Watching the devastation of the earthquake in Japan, followed by a horrific tsunami, and now a nuclear disaster, it's pretty much a no brainer that it would be wise to be prepared.


Those that were closest to the epicenter, tsunami, and reactors have suffered greatly and now the possibility of hypothermia, dehydration, and starvation are very real perils looming in the horizon. My heartfelt prayers goes out to them and I hope that a hand of mercy reaches them in time! 


Preparedness, Definition: refers to the state of being prepared for specific or unpredictable events or situations. Preparedness is an important quality in achieving goals and in avoiding and mitigating negative outcomes. (wikipedia)


Grant it, you can prepare all you want, but sometimes you can still lose all that you've stored. But imagine with me for a minute... what if everyone in Japan had been prepared ahead of time with food and water? How would this scenario been different? Would it have been?


Is it possible that those who did loose everything could be helped by those somewhat locally that still had what they put aside. Yes, the cavalry would still need to come in and lend a hand, but would they have enough to keep them alive until that time if most had some kind of food and water stored? Let's just say that the odds would certainly have been better!


Photo: USA Emergency Supply


The reality is... in our modern, disposable, consumer minded, global society, storing food and supplies is not the norm. Yes, a few cultures may still do this, but I can't think of any off hand (please let me know if you can think of some!). 


Understand that I am not writing this to be judgmental of the Japanese people! I have been duly impressed with how they've conducted themselves in their hour of trial. (Even more impressive when you know that about only one percent are Christian believers!) Sadly, I'm not sure Americans would have been as self controlled if we had been in their shoes. No looting or rioting; no pushing or shoving in lines... 


Update: I've had a reader inquire as to my statement that non-Christians should act so self controlled. Let me clarify... It is certainly possible for non-believers to act in a self-controlled manner. You're seeing proof of it when you watch the Japanese people. Without the Holy Spirit, this is very impressive, because the flesh is powerful indeed. It is to the shame of many Christians that we often do not act in a self controlled manner; but then again, one can be Christian in name only.


Let me get to my point here. I need to be more prepared than I am. There is more I could and should do. How about you? Anyone need a little push to get prepared? Maybe you've talked about it but have done very little? Perhaps you're well on your way and could encourage others to do some prepping?


I'm going to offer a simple call to do one thing each week to get prepared. Every Saturday, I'm going to put up a post to remind everyone of the challenge, but YOU get to pick what you do. To help hold us accountable, you can leave a comment telling what you've done that week or you can write a post and link up. 


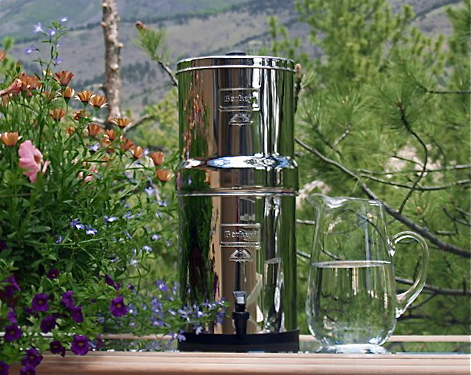
Photo: Big Berkey 


Do not feel like you must do something major each week. Even something small, such as buying a first aid kit, adding some water bottles to the pantry, or buying and planting an extra packet of seeds to grow extra food - it all counts and adds up over time! All I ask is that you clearly state what you did that week. For example, "This week, for the Preparedness Challenge, I bought an extra bag of rice from the co-op and stored it in mylar bags in a bucket". Then you can expound on it more if you'd like. 


Simple enough? I'm already shaking in my boots because I know this is really going to push me to be on the ball! I don't go to town but once or twice a week, and often I'm rushed to get things done, but I need this as much as anybody. Good thoughts of storing food doesn't make it happen. Action does. 


So, are you in? We start tomorrow!


Now, she posted that yesterday as you can see by visiting her WONDERFUL blog, so that makes today the first week of the Preparedness Challenge. :-D


For this week's challenge, all you need to do is complete this sentence...

"This week, for the Preparedness Challenge, I ___________."

You can leave a comment below with more details about how you met the Preparedness Challenge in your home. I would love to hear your ideas!

For me...

This week, for the Preparedness Challenge, I purchased a few extra bags of dry rice and beans for putting up. :-)

What did you do?